How to Pass a 3G MIG Welding Certification
Passing a 3G MIG Welding Certification

This is about how I passed the AWS D1.1 3G GMAW welding certification. I wrote down all of the details on how to pass this exam and took actual pictures of my welding certification. I am hoping I can help anyone out there who is about to take this test pass it in less time. If I had known these details before practicing to take the test it would have saved me some time practicing.
Why Take the 3G MIG Welding Certification?
The GMAW or MIG 3G welding certification is one of the most needed welding certifications for anyone who wants to work in manufacturing or fabrication shops. If you don't want to work outdoors, then this is the way to go! Since MIG welding is mostly used in shops and is a very cost-efficient welding process, it's the first choice for high production indoor welding.
The 3G welding certification qualifies a welder to weld flat, horizontal, and vertical or 1G, 2G, and 3G positions, also includes the 1F, 2F, and 3F positions without having to take the 1G and 2G certification. This one test qualifies you for three positions. These are the positions most commonly used in welding shops. Having this welding certification makes you more valuable to an employer and gets you in the door much faster than someone who does not have it!
In a shop environment most of the welding is done in the easiest position to ensure a high quality weld. Therefore, welding overhead is rarely done. Once the fabricating is done, the welders weld out the work, and when a weld needs to be placed in the overhead position, the piece to be welded is usually flipped over to give easy access. Once one side is welded piece to be welded is usually flipped over to give easy access.
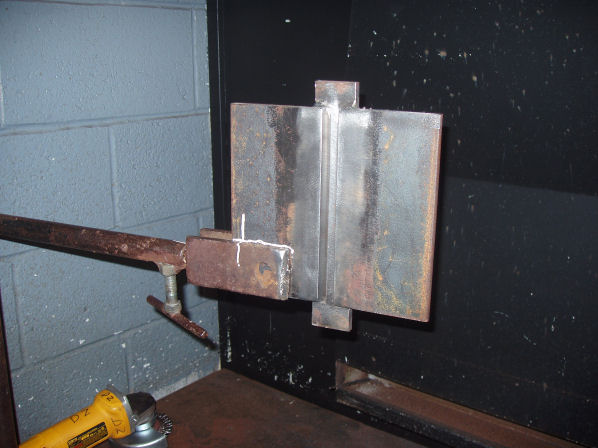
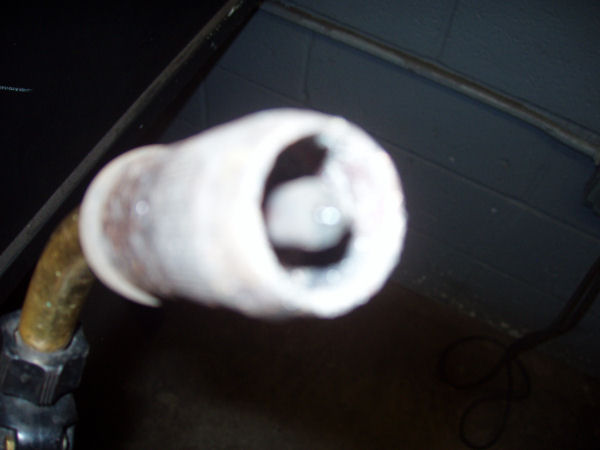
In my experience, I commonly flipped over single pieces I built using cranes in excess of 20,000 pounds to allow the welders to weld critical joints in the flat and vertical up positions. To the left is an inlet piece I built and flipped many times for the welders to get easy access. In a shop "time is money" and when it takes weeks to weld out a single component, flat welding is the fastest and best way followed by horizontal, and finally vertical up.
AWS D1.1 3G MIG Welding Certification Procedure Specification
The AWS D1.1 3G GMAW Welding Certification is a welding procedure that qualifies a welder to weld in the flat, horizontal, and vertical up and down positions. By passing this welding certification the welder demonstrates their ability to produce a sound weld according to the specifications of the welding procedure below. All this means is that the greedy American Welding Society has tested this procedure and has approved it to be a proven method to produce a good quality weld! If you can follow their rules and pass this test then that makes you a certified welder!
This welding procedure comes in two metal thicknesses; 3/8 inch-thick and 1 inch-thick plates. The 3/8 inch-thick procedure is a limited thickness procedure that qualifies the welder to weld from 1/8 inch-thick material up to 3/4 inch-thick material. This is the test I have just taken and am documenting how I passed it to help anyone who is about to take this test to also pass.
Once you are certified in this welding procedure you must not stop welding for more than 6 months. If you do, you will end up like me! I stopped welding for 12 years and had this certification done on the 1 inch unlimited thickness procedure, but when the 6-month mark hit my former welding certifications expired making the time and money I spent getting certified useless. Here are the technical specifications of the welding procedure
- Welding Process. GMAW
- Vertical Progression. Up
- Joint Type. Butt
- Backing. Yes
- Transfer Type. Spray
- Current. DCEN
- Base Metal. ASTM A36
- Backing Material. ASTM A36
- Root Opening. 1/4 to 5/16
- Grove Angel. 45 degrees
- Thickness. Groove. (in) .375
- Shielding Gas. Stargon
- Composition. Ar.>90%, Co2<10%, Ox <5%
- Flow Rate. 15 – 35 CFH
- Gas Cup Size. 1/2 to 5/8
- Technique. Stringer or Weave Bead
- Multi Pass. Yes
- Inter Pass Cleaning. Mechanical or Wire Brush
- Preheat Temp. Min 60 degrees
- Amps:150/175
- Volts: 24/26
- Travel Speed: 4/6 for the root and 4/7 for fill pass 1, 2 and the cap.
MIG Welding Machine Set Up
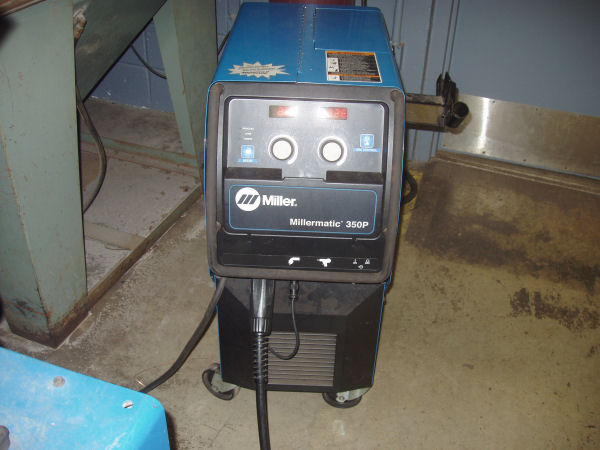
Set up of the MIG welder needs to be done according to the procedure specifications. My welding certification was done using a Millermatic 350P. I had never used one of these before and I have to admit that at first I was intimidated. The machine has all of the bells and whistles and it is computerized!
First things first! We put on a bottle of Stargon gas (just a name brand), and then checked the welding cup size. It was a 5/8-inch cup, and then changed the welding wire to a .035 diameter E70S-6 electrode.
The way we set the welder was by using a practice joint that was the same thickness and joint type as the test plate. It was a 3/8-inch thick plate with a 45-degree groove bevel. The plate was put in the vertical position and I started to weld. At the same time, the welding inspector set the machine to read amperage. He fine-tuned the voltage and wire speed settings until the amperage was reading a minimum of a 150 amps. Although the procedure states a voltage of approximately 24 to 26 volts, the amperage is what needs to be met. This was the only way the amperage could be met on this machine.
All I could say was, "Wow". I almost always weld at the maximum recommended amperage, but spray transfer at 150 amps in the vertical up position was extremely hot and took a little bit to get used to. The weld was very fluid, it was hard to control at first, and the least bit of hesitation in travel speed would make the weld droop in the center. As a note, the amperage needs to be set when you are welding in the vertical up position. We tested the same setting in the flat position and the amperage then read about 180.
For the root pass and two filler passes, the settings on the MIG welder were 21.6 volts at 155 amps, wire speed was set at 340, the INDU was set at 6, and gas flow at 25 CFH.
For the cap, the welder was set at 22.4 volts and 150 amps, a wire speed of 326, the INDU at 0, and the gas at 25 CFH. On the cap, the wire speed was decreased because with the other settings the cap was too high to pass the visual inspection.
Joint Preparation for the 3G Welding Certification
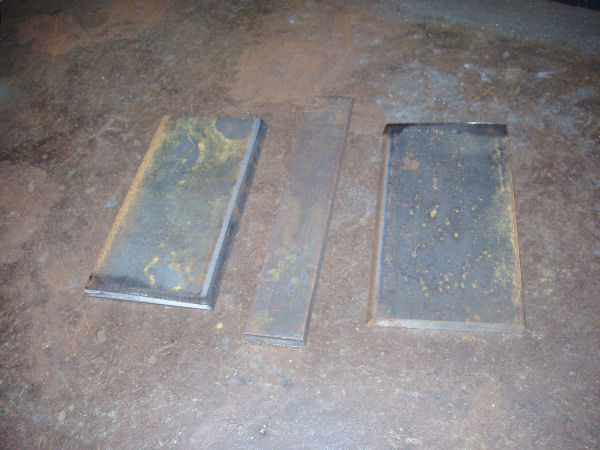
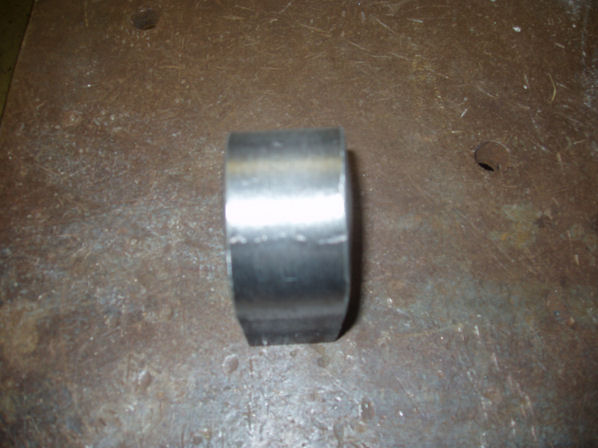
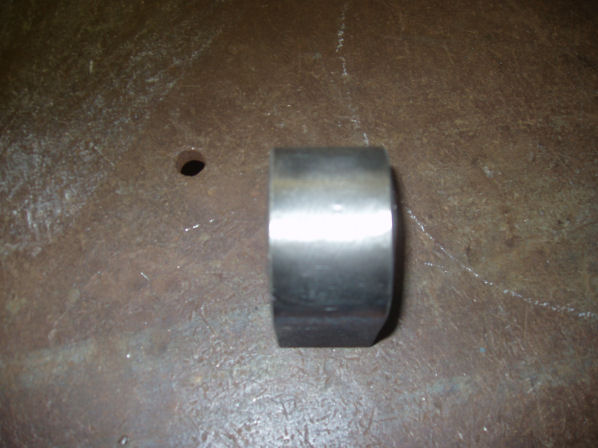
Here is the test coupons I received that was already beveled.
- The first thing I did was grind the bevel to remove any slag left from it being cut with a torch.
- Secondly, I ground the mill scale off of the face area next to the bevel with a minimum of 1-inch back.
- Thirdly, I grind the mill scale off of the back area next to the bevel with a minimum of 1-inch back.
- Finally, I ground down the face of the backing bar.

After this, the bevel was checked with a protractor to ensure that the bevel on the coupons was a total of 45 degrees. Each bevel was exactly 22.5 degrees for a total opening of 45 degrees with complete feathered edges. The welding procedure specifies a minimum tolerance of 45 degrees and up to 55 degrees for the bevels opening.
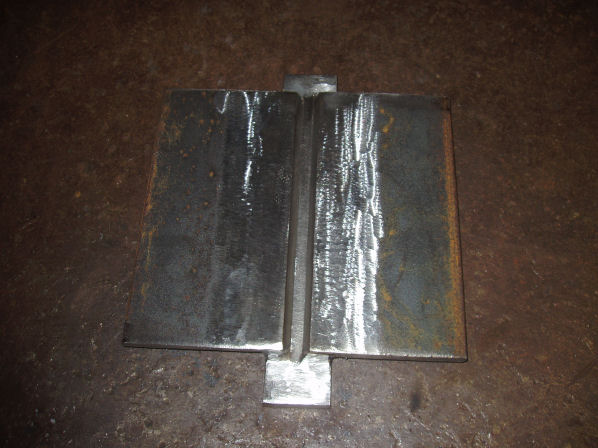
Next, I tacked one beveled piece to the backing bar. Before tacking the next piece I took two 1/8 Stick welding electrodes to set the root opening. I laid the other bevel onto the backing bar and then took the two electrodes and pushed the root opening until it was two electrodes wide. The two electrodes could be moved past each other with just a slight scrape against one another. Then I tacked that piece on.
Finally, I put the tacked coupon in a vice to make sure the plates were sitting flat and then put two tacks on the middle of the back of the plate.
How to Pass the GMAW AWS D1.1 3G Welding Certification
Pre-Inspection of the Test Plate
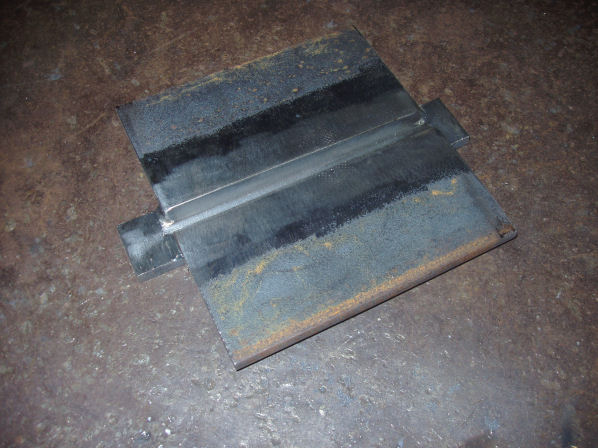
Once I had the test plates tacked together, the inspector used the same technique to check the root opening. Two 1/8-inch Stick welding electrodes had to be able to slide past each other with no more than 1/16 of an inch space between them. The welding procedure states a root opening with a minimum of a 1/4 inch width to a maximum width of 5/16 of an inch.

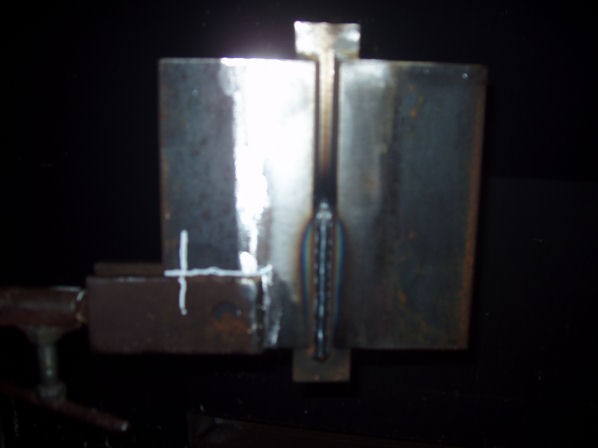
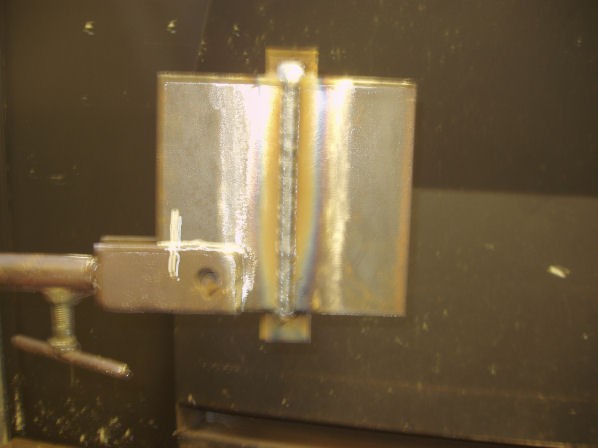
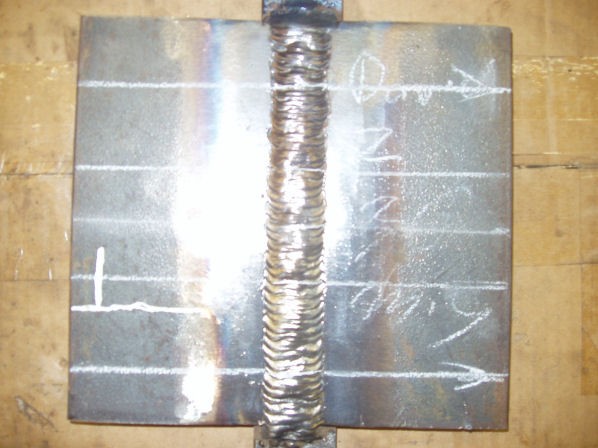
Next, I put the plates into the vertical position and the welding inspector checked it. He then took a white marker and put a few marks on the mount that was holding my test plate. He does this to make sure that when you take the test you never move the plate out of its position and if you do he will know! As you can see in the pictures, he made multiple marks.
The Root Pass
To begin with, preheating of the plates did not apply to this test for me. I took this test on December 6, 2008 in South Florida. The weather at the time of the test was about 80 degrees. So I easily met the minimum preheat of 60 degrees.
To start the root pass I set the welder to the settings that I used to practice on and the welding inspector checked the amperage again. The welding machine was running at 21.6 volts at 155 amps, with the wire speed was set at 340, the INDU was set at 6, and gas flow at 25 CFH.
Since the welding procedure states the welder must stop and restart somewhere on the weld joint, I decided to stop in the middle of the root. At this point, the welding inspector checked the weld.
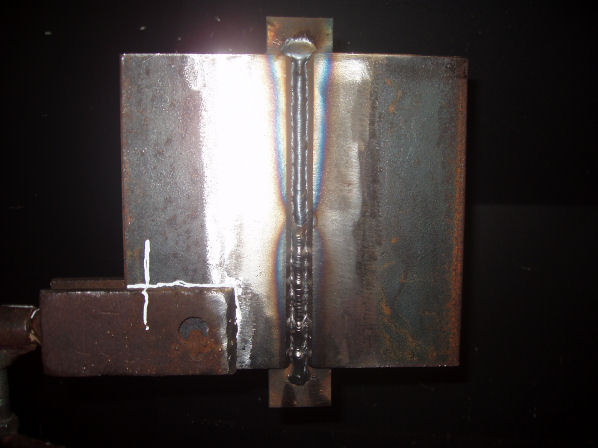
The technique I used to do the root was a tight side-to-side weave, pausing slightly on the sides until the feathered edges would melt through by creating a crater and filling it. As you can see, with the amperage so high and the wire speed so fast the weld is very convex. Again the welding inspector checked the weld.
This is done because it is in the welding procedure and the American Welding Society states:
"The root of the weld shall be inspected, and there shall be no evidence of cracks, incomplete fusion, or inadequate joint penetration. A concave root surface is permitted within the limits shown below, providing the total weld thickness is equal to or greater than that of the base metal. The maximum root surface concavity shall be 1/16 in. (1.6 mm) and a maximum melt-through shall be 1/8 in. (3 mm)"
Before I put the first filler pass, I ground down the center of the weld to make it flat. Otherwise the next pass would not fuse the edges properly and the weld would droop in the center too much.
Filler Pass #1
Before putting in the first filler pass I waited for the plate to cool. I use a very unscientific method that works well for me. I put my hand near the plate and when the plate becomes cool enough for me to touch it then I begin the next pass.

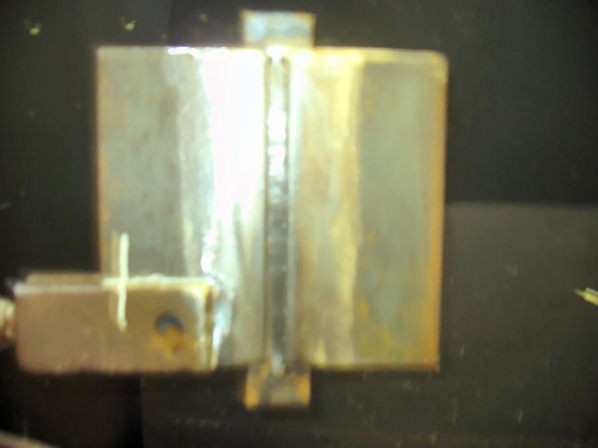
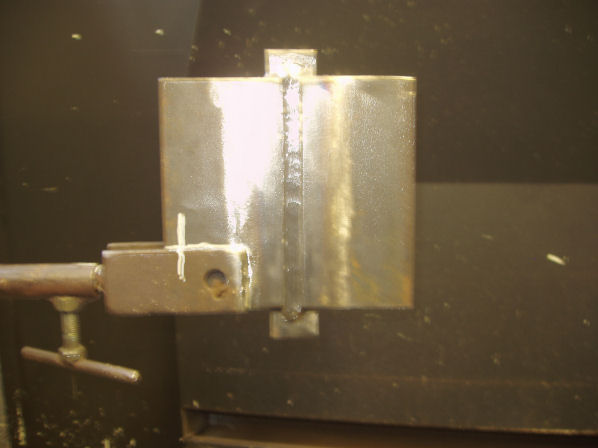
On the first filler pass I used the same welding machine settings as the root pass. What I did differently is that I paused a little bit longer when I washed the weld into the sides, since the joint is wider. It's almost the same tight weave as on the root pass. I welded this pass without any restarts. Again, as you can see, the weld is very convex. Before putting in the second filler pass I ground down the center of the weld to make it flat.
Filler Pass #2
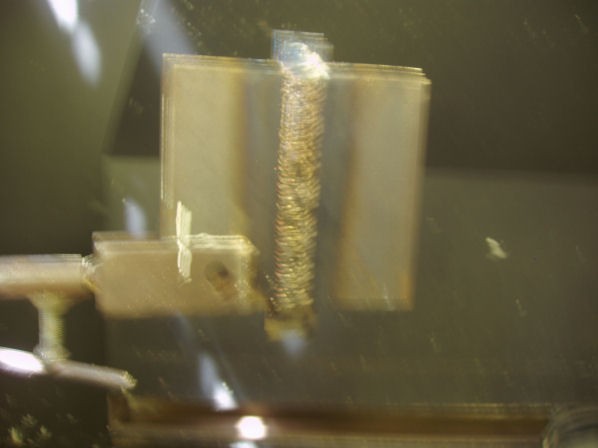
Again, I had to wait until the plate cooled enough to be able to barely touch it. Otherwise if I welded it when it was too hot the plate would over heat and I would run the risk of spilling the weld. The technique I used on the second filler pass was a side-to-side weave. The difference was when I paused on the sides I could slowly say "1001" before moving across to the other side.
Here is the trick. If you grind down more than that, you will either get too much undercutting on the cap, or if you grind down less than that the cap will be too high and you will fail the visual inspection. Once again, the weld is too convex to put the cap on properly due to the machine running so hot. The solution is to grind down the center of the weld until it has a flat surface. There is a very important trick when grinding down this pass. This pass needs to be ground down about 3/32 of an inch from the face of the plate.
The AWS D1.1 procedure clearly states that the cap must not be higher than 1/8 of an inch over the plate surface. In the American Welding Society"The face of the weld shall be flush with the surface of the base metal, and the weld shall merge smoothly with the base metal. Undercut shall not exceed 1/32 in. (1 mm). Weld reinforcement shall not exceed 1/8 in. (3 mm)"
3G MIG Welding Certification Test Cap Weld
When doing the cap you have to wait for the test plate to cool down to the point where you can touch it without burning yourself. The cap pass is going to produce a lot of heat because you will be using a wide weld.
While waiting for the plate to cool I changed the MIG welding machine settings to what I practiced on. The settings were 22.4 volts at 150 amps, a wire speed of 326, the INDU at 0, and the gas flowing at 25 CFH. When I started to weld, the welding inspector checked the amperage again. The cap was very tricky for me to get it to fall within the 1/8 in reinforcement rule. When I practiced the cap, the cap kept coming out too high at first. When doing the cap weave, you need to start by building a shelf of weld on the bottom of the joint. The technique I used was to hold the sides for two seconds then move across. In order to keep the weld from being too high you need to weave at least a 1/8 of an inch past the edge of the bevel on the 3/8 inch limited thickness procedure, or keep the weld to a minimum of 1 inch wide. Anything less will fail the visual inspection by having too high of a weld!
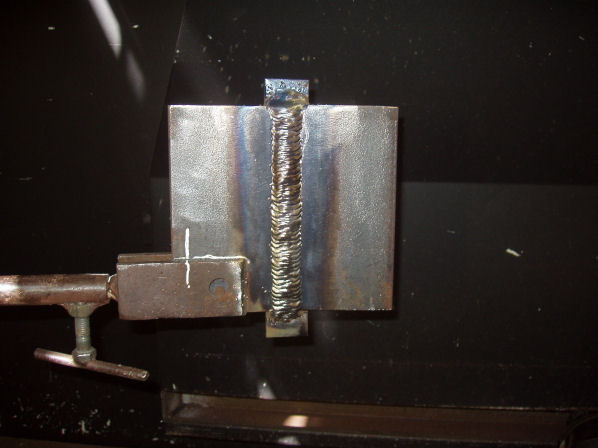
Although the cap passed the visual inspection, I am a little disappointed with the visual. As you can see, there is a slight bit of undercut but it's within the 1/32 of an inch allowed. Unfortunately, I rushed the cap because the school was closing in 20 minutes. My last practice piece before the test had no undercut so I knew I could have done better if I had not felt so pressed for time.
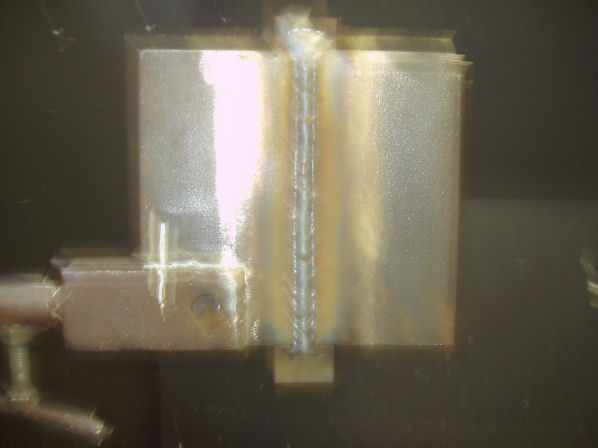
Finally, I cleaned the weld surface with a wire wheel to make it shiny and expose the weld surface by removing the little bits of slag the weld produced.
Welding Certification Test Coupons Preparation
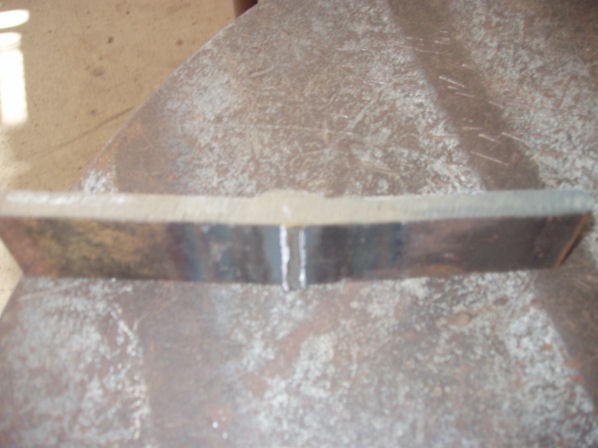
Since it was Monday and I took the test on a Friday it had enough time to cool down. First I marked the plate where to it was to be cut according to the procedure.
The first mark was put in the center of the plate. Then you need to put a mark one inch above it and one inch below it. Then the next marks are 1½ inches above the top mark and again 1½ inches below the bottom mark. The two outside marks are the bend specimens. In the case of a failure the middle of the plate can be used as a back up as long as the failure of the bend falls within the AWS acceptance criteria for a bend test.
Cutting Test Coupons on a Horizontal Band Saw
Then the pieces are cut on a horizontal band saw.


Welding Inspector Marking Test Coupons
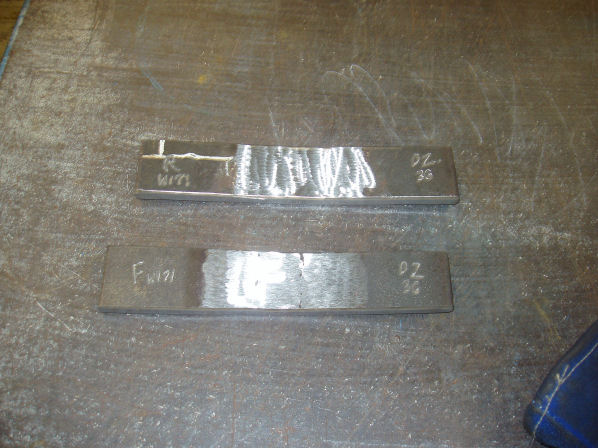
Next the welding inspector marks the plates with a inscribing tool. He marks my initials on the two test specimens. One piece gets marked for a root bend and the other gets marked for a face bend. Then its time to remove the backing bar. First you need to grind the sides of the plates to get rid of the cut marks from the band saw. Second, the area where the root penetrates the backing bar needs to be marked. To do this you need to move the piece at different angles in order to see the root. Once you see the root you mark lines where the root is with a soap stone. Now its time to grind out the center of the backing bar. As a note, you need to be careful grinding because if you grind into the test plate, the test is automatically rejected. Then you grind out that section until you can get a chisel in and pry off the sides until they break off.
Before grinding the cap and root, the center of the welds needs to be marked with a punch to allow identification of the weld area later. The cap of the weld is ground flush with the surface and the remaining backing is also ground flush. When doing this, you may not grind into the plate. If any of the area is ground lower than the mill scale, the test will be automatically invalidated.
3G MIG Welding Certification Bend Test
There will be two pieces bent. One piece will be a root bend and the other will be a face bend.The rules of the bend test are as follows in the words of the American Welding Society.
"Acceptance Criteria for Bend Tests. The convex surface of the bend test specimen shall be visually examined for surface discontinuities. For acceptance, the surface shall contain no discontinuities exceeding the following dimensions:
(1) 1/8 in. (3 mm) measured in any direction of the surface
(2) 3/8 in. (10 mm) – the sum of the greatest dimensions of all discontinuities exceeding 1/32 in. (1 mm) , but less than or equal to 1/8 in (3 mm).
(3) ¼ in. (6 mm) – the maximum corner crack resulting from visible slag inclusions or other fusion type discontinuities, then 1/8 in. (3 mm) maximum shall applySpecimens with corner cracks exceeding ¼ in. (6 mm) with no evidence of slag inclusions or other fusion type discontinuities shall be disregarded, and a replacement test specimen from the original weldment shall be tested."
Here is the root bend and the face bend. I have to admit, I was saying to myself, "Just my luck! No undercut on the root bend piece! Just the face bend piece!" I was almost sure I was going to fail the face bend due to the little bit of undercut that was on the face bend piece.

Finally, the pieces passed and this is how I passed the AWS D1.1 3G MIG welding certification!