How to Do a Open Root E6010 Weld on Pipe
Open Root Pipe Welding Techniques
The 6G open root was done with a 1/8 E6010 electrode at 83 amps using a whipping technique. Most of the time I was dragging at about 5 degrees while pointing the rod to the center of the pipe. If you do not always point your rod to the center of the pipe and keep the keyhole centered you will get a lack of fusion. In the event that the keyhole is closing up you need to lead the rod at about 5 to 10 degrees. The hard part of the root is the bottom half of the pipe.
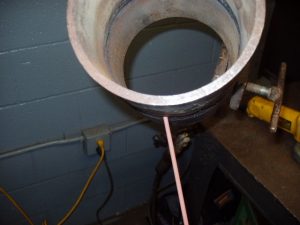
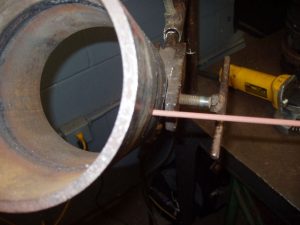
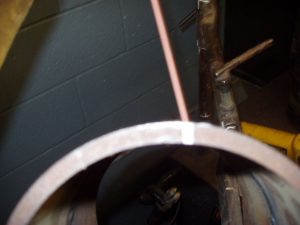
Below are some basic guidelines for troubleshooting open root welds. Above all, when you are not sure about the root, STOP WELDING at once!
Troubleshooting Open Root Pipe Welds
Keyhole Getting to Big
- Increase the angle of the drag.
- Lower the amperage.
- Start to whip the rod in longer motions.
Keyhole Closing Up
- Start pushing the rod forehand toward the direction of travel.
- Increase the angle of the push.
- Raise the amperage.
Concave Root Or Suck Back On The Inside Of The Pipe
- Push the rod inside the pipe so the arc is in the inside when welding. The sound of the electrode burning should be coming from the inside of the pipe.
- Slow down your travel speed.
- Start to use a Very tight whip that is almost a slow steady motion. You want to give the electrode enough time to properly fill the root.
- Lower your amperage.
- Keep the keyhole smaller.
Restart Trouble Or Tie In Lacks Fusion
- Feather all tacks and restarts with a grinding wheel.
- Piggy Back all restarts and tie ins at least a 1/4 of an inch.
- Pause for a second on all feathered edges to burn in properly.
- When tying in don't stop welding until you have penetrated the tack and covered most of it.
How To Do An Open Root Pipe Weld In The 6G Position
The first part of my root was from the 6 o'clock to the 9 o'clock position. Since I am mainly right handed this is my hard side for the root. What makes it difficult is that I am welding from right to left, so the handle and electrode naturally block my view of the keyhole.
What I did was position myself in a way that I can see the keyhole at all times.The downside is it is very difficult to stay in that position without getting any muscle cramps. To start the weld I piggy backed on the 6 O'clock tack while preheated the electrode on the tack. Then slowly whipped the rod until I was on the feathered edge of the tack. Once I could see the weld burning into the feathered edge I paused for a second pushing the rod inside the bevel to let the arc shoot up enough filler metal to tie into the tack properly. After that I was just a simple whipping motion until I got to the 9 O'clock tack. When I got onto the tack I kept welding until I was past the feathered edge.
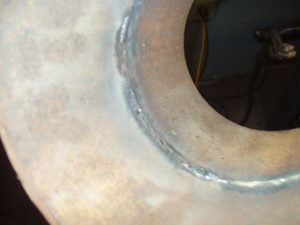
The second rod I used was done on the root from the 9 o'clock to the 12 o'clock position. Before starting to weld I used my grinder to clean up the 9 o'clock tack that was piggy backed from the previous weld. Once it was cleaned up I piggyback that tack and started whipping. When tying into this tack I did not pause too much. On the upper half of the pipe gravity is in your favor. In this case it is easy to have too much penetration on the inside of the pipe. The technique I used was just a whipping motion while dragging the rod about 5 degrees, and above all, the electrode needs to always be pointing to the center of the pipe. When coming up to the 12 o'clock tack I piggyback half way over it.
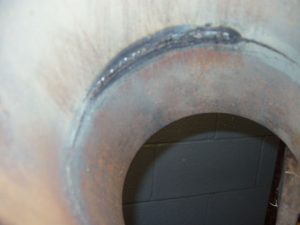
My next root pass was from the 6 o'clock to 3 o'clock position. It is the easy side of the bottom half of the root if you are right handed. This is because you can easily see the keyhole for right handed people. On this side of the weld I used my left hand to lean on the pipe while leaning the electrode on my thumb to guide the rod. Once the electrode burned short enough I slowly took my left hand off of the pipe and went to holding the handle with two hands. Before starting to weld I ground the 6 O'clock tack from the previous piggy back restart. Just like the other bottom half of the pipe I let the rod preheat and paused and pushed the rod into the root when burning into the 6 o'clock tacks feathered edge. After that it was just a whipping motion and then piggy back onto the 3 o'clock tack.
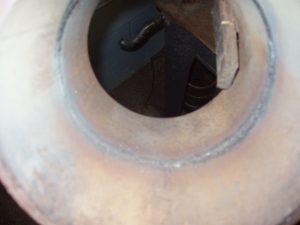
My final root pass was done from the 3 o'clock to 12 o'clock position. Before starting I grinded down and feather the edge of the 3 o'clock tack where my last weld stopped. On this side of the pipe I had to sit on the table to get a good view, otherwise I would not be able to weld 90 degrees in a single pass. I have a bad habit of making long welds even when I can't see where I am going. In most cases shorter welds are fine as long as you grind and feather your restarts. Just like the other top half of the pipe I piggybacked the restart onto the tack then let the electrode preheat, burned into the feathered edge, followed by using a whipping motion up to the 12 o'clock tack. Once I got onto the 12 o'clock tack I piggyback half the tack.
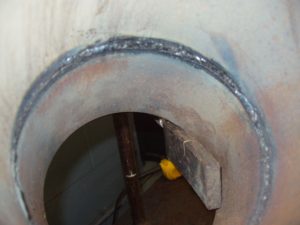
Inspection Of The Open Root Weld
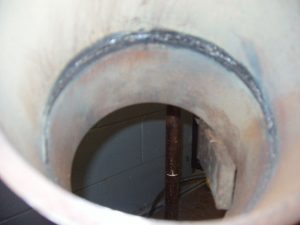
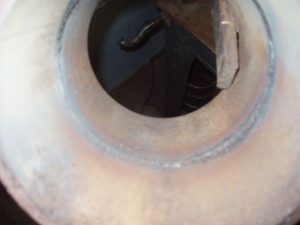
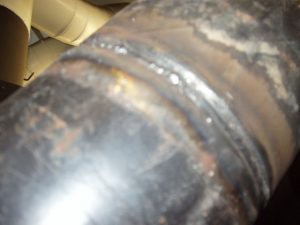
The root inspection was done after I finished the root. I did have a repair that I had to grind out and open it up with a 1/16 cutting wheel. I did the repair because there was a lack of fusion due the pipe root opening closing up from the weld shrinking. Repairing an open root weld is pretty easy if you know what to do. First the repair area of the weld needs to be grinded to the same thickness and approximately the same dimensions of the original bevel. Next you take a cutting wheel and reopen the defective root area. Then all you have to do is re weld the root and that is it. I will not show it because that might make my root no longer passable. But I will say that area was part of the bend test! Once I finished the root of the weld I cleaned the weld penetration up as much as I could using an electrode to chip off the slag. Most open root welds look like they penetrated properly when the slag is covering it. It's one thing to have a nice looking root with slag on top of it but another to see the actual weld! The root was inspected thoroughly using a mirror like the dentist uses to check your teeth. My root pass was inspected and I got to move on! The rules for passing a root inspection are as follows:
"The root of the weld shall be inspected, and there shall be no evidence of cracks, incomplete fusion, or inadequate joint penetration. A concave root surface is permitted within the limits shown below, providing the total weld thickness is equal to or greater than that of the base metal. The maximum root surface concavity shall be 1/16 in. (1.6 mm) and a maximum melt-through shall be 1/8 in. (3 mm)"
Next page: Hot Pass Pipe Welding Technique
Contents overview of the 6G pipe welding certification: